How To Use A Sous Vide For Summer Bbq Ribs On Labo
Labor Day weekend ribs should taste like you worked all day, not like you babysat a smoker. A sous vide lets you lock in tenderness first, then finish fast on the grill for real barbecue flavor without the usual guesswork.
Season the ribs, seal them in a bag, and cook them in a sous vide bath at 165°F to 170°F for 12 to 24 hours depending on how tender you want them. After that, pat them dry, glaze with sauce or dry rub, and finish them on a hot grill for a few minutes per side to build bark and smoke flavor.
Quick Answer
Table of Contents
Why Sous Vide Works for Holiday Weekend Ribs
Ribs are one of those weekend foods that can go from great to expensive disappointment in a hurry. Too much heat dries them out. Too little time leaves them chewy. Sous vide solves that by holding the meat at a precise temperature long enough to break down connective tissue without overcooking the muscle.
This is especially useful on Labor Day, when the grill is already crowded with burgers, corn, and whatever else the family “just decided” to bring. You can do the hard part ahead of time, then finish the ribs right before eating. That means better timing, less stress, and no more serving ribs that went cold while you chased the rest of dinner.
Here’s the honest truth: sous vide ribs are not magic by themselves. If you skip the finishing step, you’ll get tender meat with weak barbecue character. The win comes from combining sous vide precision with a hot grill, broiler, or countertop oven finish. That final blast is what gives you bark, color, and a more convincing BBQ texture.
What You Need Before You Start
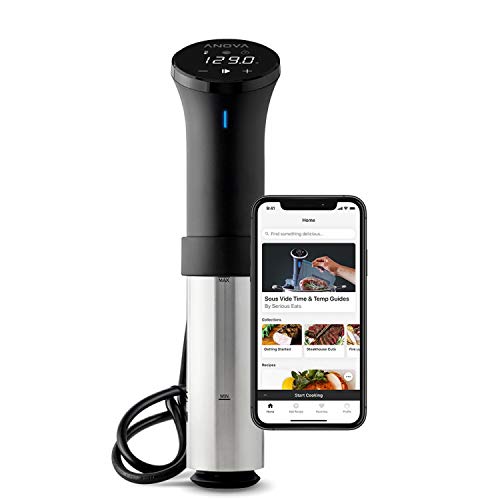
You do not need a kitchen full of gadgets, but you do need the right ones. A reliable sous vide circulator matters more than fancy branding. If the water temp drifts, the whole point of the method falls apart. A large pot or container, freezer-safe zipper bags or vacuum-seal bags, tongs, and a good thermometer are the basics.
On the prep side, use a sharp knife set or a solid chef’s knife to trim the membrane if needed. A food processor is not part of this recipe, and anyone trying to make ribs “faster” by over-processing marinades is missing the point. For sauce, a blender can help if you’re making a smooth homemade BBQ glaze, but it’s optional. Countertop ovens and air fryers can finish ribs too, but a grill gives the most natural holiday BBQ result.
If you use an Instant Pot with sous vide mode, be realistic: it can work for smaller batches, but it’s not always the best performer for large rib slabs because capacity is limited. Coffee makers, blenders, and other small appliances have their place in the kitchen, but for ribs, stability and container size are what matter. This is one of those times when performance beats hype every time.
Step-by-Step: Cooking the Ribs Sous Vide
Start by removing the membrane from the back of the ribs if it’s still on. This step matters. Leaving it in place can make the finished texture tougher and can block seasoning from working properly. Trim any loose flaps of fat, then season generously with salt, pepper, garlic powder, paprika, and a little brown sugar if you want a sweeter profile.
Bag the ribs in a single layer if possible. Add a tablespoon or two of barbecue sauce if you want, but don’t drown them. Too much liquid in the bag dilutes flavor and makes the finish messier. Seal the bag well, then set your sous vide to 165°F for ribs that are tender but still slice cleanly, or 170°F if you want them softer and closer to that fall-apart style.
Cook for 12 hours for a faster turnaround, or 18 to 24 hours if you want a more classic tender rib texture. Pork ribs are forgiving, but they still need time. Baby back ribs usually cook a little faster and can be excellent at 12 to 16 hours. Spare ribs and St. Louis-style ribs often benefit from the longer end of the range.
When the time is up, remove the ribs carefully. They’ll be very tender and can tear if you rush. At this stage, you can either finish them right away or chill them for later. If you chill them, keep the bag sealed and refrigerate until you’re ready to grill. That’s one of the cleanest ways to handle Labor Day timing without chaos.
How to Finish Ribs on the Grill Without Ruining Them
This is where a lot of people blow it. They overcook the ribs a second time and end up with dry meat that tastes like regret. The finish should be fast and hot. Preheat the grill, clean the grates, and aim for medium-high to high heat. You want color and texture, not another long cook.
Remove the ribs from the bag, then pat them dry with paper towels. Moisture is the enemy of browning. Brush on a thin layer of sauce or oil if you want better browning, then place the ribs on the grill meat-side down for just a couple of minutes. Flip, glaze again, and keep moving until you get the bark and char you want.
If you do not have a grill, a countertop oven with a broiler setting can work surprisingly well. An air fryer can crisp the edges on smaller rib portions, but it is not the ideal tool for full slabs. It’s the same story with most kitchen appliances: the machine matters less than whether it matches the job. For full BBQ-style ribs, the grill still wins on flavor and presentation.
Do not walk away. That final stage is fast, and sugar-heavy sauces can burn quickly. If you want a sticky finish, apply sauce late in the process and watch for flare-ups. The goal is glossy ribs with a little char, not blackened candy.
Troubleshooting, Storage, and Serving Tips
If the ribs come out too soft, your temperature was probably too high or your cook time too long for the style you wanted. That’s not a failure, but it does change the texture. For a firmer bite, drop the temp slightly next time and shorten the cook window. Sous vide gives you control, but only if you pay attention to the details.
If they taste flat, the issue is usually underseasoning before the bag or skipping the finish sauce. Sous vide doesn’t create flavor out of thin air. It preserves what you put in. Be generous with dry rub, and don’t be shy about adding a bold glaze during the grill finish.
For leftovers, cool the ribs quickly and refrigerate in a sealed container. They reheat well in a sous vide bath around 140°F or in a low countertop oven wrapped in foil with a little sauce. An air fryer can revive the edges, but it is better for smaller portions than for full rack reheating. If you’ve got a slicer or a sharp knife set, slice only what you need and leave the rest intact for better moisture retention.
Serve with simple sides that do not compete: coleslaw, baked beans, corn, potato salad. You do not need a food processor contraption making ten components when the ribs are already the star. Clean food, good timing, strong finish. That’s the whole deal.
Common Mistakes That Waste Time and Meat
The biggest mistake is assuming sous vide means you can ignore the rest of the process. You still need seasoning, sealing, and a real finishing step. The second mistake is cranking the temperature too high because you want faster results. That usually gives you mushy meat instead of better ribs.
Another classic error is using a flimsy bag or poor seal. If liquid leaks into the bath, you lose flavor and can mess with circulation. A vacuum sealer is cleaner, but quality zipper bags can work if you remove as much air as possible. Do not cheap out on the bag and then blame the circulator when the results are mediocre.
Finally, don’t treat the grill finish like an afterthought. That last step is what turns sous vide pork into actual BBQ ribs. Without it, you have tender pork with no bark. With it, you get the best of both worlds: controlled tenderness and real cookout character.
Frequently Asked Questions
Can I sous vide ribs and finish them the next day?
Yes. In fact, that’s one of the best ways to handle holiday cooking. Chill the sealed ribs after cooking, then reheat briefly in the bag and finish on the grill when it’s time to serve.
Do I need to remove the membrane first?
Yes. It improves texture and helps seasoning penetrate better. It takes a few extra minutes and is absolutely worth it.
What temperature should I use for barbecue-style ribs?
165°F is a solid middle ground for tender but still sliceable ribs. Go up to 170°F if you want them softer and more fall-apart.
Can I use an Instant Pot for sous vide ribs?
If your Instant Pot has a true sous vide function, yes, but capacity can be limiting. For full racks, a dedicated circulator and larger container are usually easier and more reliable.
Will an air fryer work for the final step?
It can work for smaller pieces or sliced ribs, but it is not the best choice for full slabs. A hot grill or broiler gives better bark and a more convincing BBQ finish.
Should I add sauce before cooking or only at the end?
Use a dry rub before cooking and save most of the sauce for the finish. That gives you better flavor control and keeps the bag from getting watery.
Bottom line: sous vide ribs are a smart Labor Day move if you want tenderness without the usual grill drama. Cook them low and steady, finish them hot and fast, and do not skip the final char. If you want the clearest path to great results, use a reliable sous vide circulator, a real grill for finishing, and enough time to let the process work. Winner: sous vide-cooked ribs finished on the grill. Runner-up: sous vide ribs finished under a countertop oven broiler.